

Creating Documentation
Whenever creating something in programming, at some point it will require documentation in order for the end-user to be able to fully understand and make full use of your library, executable and etc.
But how can we do it as seamlessly, continuously synchronized? Additionally, spend less time and more on our creation. Because face it, documentation isn’t always so fun but can be very vital.
Doxygen
Doxygen, is a tool that can support parsing multiple languages, in our case, C/C++, see their website to see if your language of interest is supported. It supports generating both Html, XML, Latex and more. Here will take a look at Html.
Configuring Doxygen
First order of business, installing the tool, first for Linux/Unix user, it is as simple as following. For Windows, see the Doxygen website, under download.
apt install doxygen
Once install, we need to create Doxygens’ configuration files. This can be done by the following command. It will create a default file called Doxyfile unless specified explicitly.
doxygen -g
The content Doxyfile file can be quite intimidating, with several thousands of lines of configurations. Though, most of it is the documentation for what each attribute does. So take your time trying to understand what each does and what is useful for you.
But for starters, the most important configuration for getting started will be the following.
- INPUT – It specifies which directory or file that should be included in the parsing and generating of documentation.
- RECURSIVE – The recusive attribute can be quite useful for adding add all subdirectories of the main source code directory. But only optionally. It takes values of either YES or NO.
INPUT = ../mySourceCodeFolder/
Generating Documentation
Once the configuration is done, we can start generating our documentation. For step will need to use the Doxygen tool again and our configuration file. See the following command.
doxygen Doxyfile
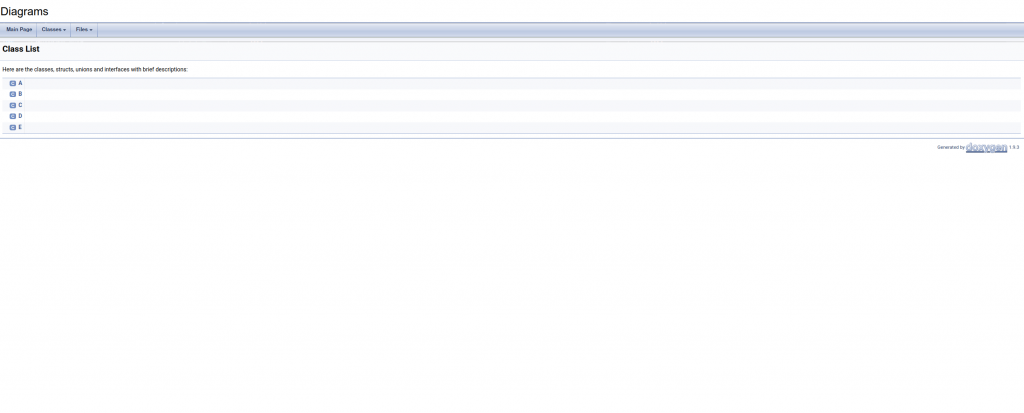
If everything was successful, there will be a couple of subdirectories from where you executed Doxygen. For starters, let us take a look at the html directory. It contains a website version.
Inside the html directory, open the index.html file with our favorite browsers and it should look something like the following.
Stylized Website
Doxygen by default does not use any modern look for both their website and PDF and etc. But that is not a problem, since it does support adding a custom style. One of these is the Doxygen-Awesome-CSS. This will make your documentation on the website look more modern. Furthermore, it supports a dark mode which is we all know is a blessing for us developers.
Check out the installation guide, as simple as downloading the CSS file, followed by assigning the file path to the HTML_EXTRA_STYLESHEET attribute in the Doxygen configuration file.
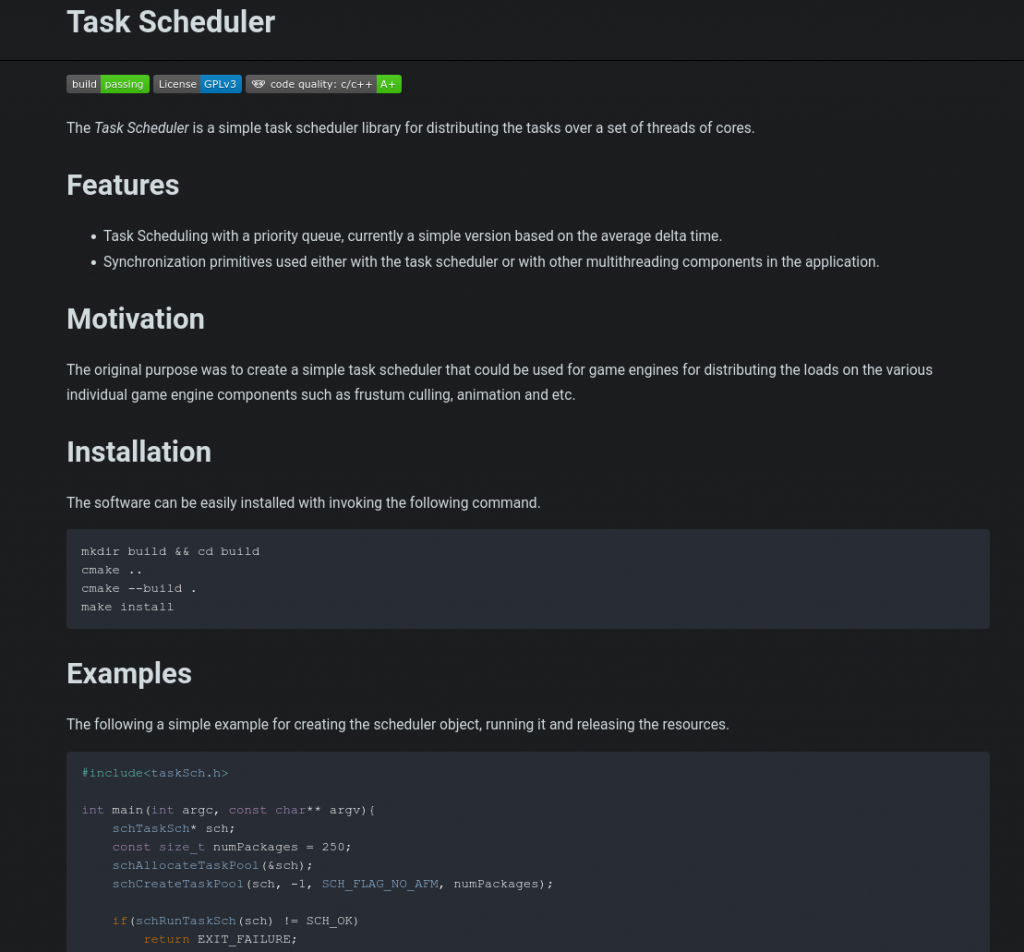
Use README as Front Page
In addition, to support extracting documentation from code and presenting it. Additionally, it is also possible to integrate the readme that many projects today already have in their project folder.
Inside the Doxyfile config file, add the file path to the readme file, see the following example. This will set which readme file will be as part of the main page.
USE_MDFILE_AS_MAINPAGE = README.md
Finally, the file path to the readme needs to be added to the INPUT attribute as well. See the following example.
# directories like /usr/src/myproject. Separate the files or directories with
# spaces. See also FILE_PATTERNS and EXTENSION_MAPPING
# Note: If this tag is empty the current directory is searched.


INPUT = README.md
Final About Doxygen
Even though that Doxygen may not have the most appealing visual presentation. The extracted information can very easily be used with other documentation tools. Like Sphinx, for instance, that can use the XML generated to get a good-looking website and possibly many mores.

Support me by donation or by using the Affiliate links for your next purchase to help maintain this website.


Free/Open software developer, Linux user, Graphic C/C++ software developer, network & hardware enthusiast.